|
When iPhone says no service it means you can' t use the basic things, such as texting, calling, and using mobile data. The only way to access the Internet is by connecting to a Wi-Fi network if lucky. You won' t to use the mobile internet until you get rid of the error. The same thing goes for messages and calls. The issue will appear in the areas with no network coverage, or in the areas where network coverage is poor when you can also see a message 'searching for service'. Some other reasons for no service on iPhone are damaged SIM card, the fact the card is not properly placed in the tray, or a software bug. The problem may also appear after iOS upgrade. So there are many reasons for iphone 6 no service. Now I will introduce the solution for your problematic iPhone 6.  The faulty is that there is no service on iPhone 6. It' s been repaired, but it' s not fixed. After we received the iPhone 6, we started checking the iPhone. We can't find the operator in manual condition. Disassemble the iPhone 6 by phone opening tool, take out the motherboard, we can found that the colleague has been repaired RF parts, now we need to fix it step by step. As shown in picture 1-1. 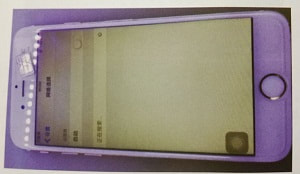 Let' s start with the easiest. Soldering jump wire on U1、V1 pin, still no service. Because the colleague repaired too many chips, as long as the chip on the RFFE bus has problems, it will affect this. Remove all chips except 2G power amplifier on RFFE bus, the iPhone still no service. Then we replace the antenna switch and RF IC, the problem still the same. It seems that colleagues have amplified the problem. Now we use multimeter to measure the power supply on RF IC U_WTR_RF, we found that the resistance at both ends of the R38808_RF resistor on VDD_XO_2V power supply is incorrect, one side it 438, the other side is 564. U_WTR_RF and R38808_RF in the circuit diagram position as shown in 1-2 and 1-3. 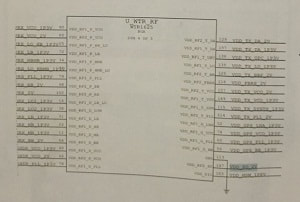 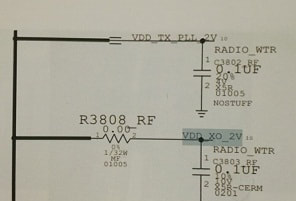 When we use multimeter Lead Probe to press it, it' s back to normal, so we can judge that the resistance is virtual welding. Now we find the problem, so we solder it with soldering station. After finish it, we assemble the iPhone and test it, the signal was back. As shown in picture 1-4. 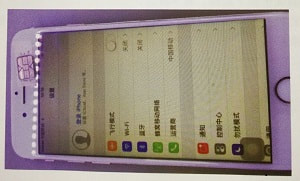 Finally, we put the removed RF IC back in iPhone motherboard, as shown in picture 1-5. The repairs end here. 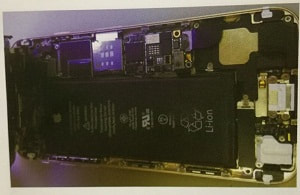
0 评论
we learned that the upgrade of iPhone 6s from 16GB to 128GB is more and more easy and convenient. And many upgrade tools with a 128GB module can update and upgrade the 16GB flash memory on an iPhone. The cost is inexpensive instead of the $200 extra that Apple would charge to buy a 128GB iPhone. China has many iPhone experts that have this skill to help you save your money. It turns out that the price has significantly dropped since then, and the 30-minute upgrade now costs about $60. Now, this article show you the process. More information about phone repair guides and tools, pls click Vip Fix Shop Team. More Read: The iOS 11 System Hard Disk Expansion Precautions  Tips: 1. The PCIE NAND Flash Chip Programmer involved is mainly applied to iPhone 6s / 6s Plus / SE / iPad Pro. 2. This upgrade work is required the skilled repair-man and not be suitable for doing at home. 3. It’s suitable for upgrading iPhone 6s internal memory. 4. It has Hi-speed performance, and the same fast speed as previous 16GB. 5. Apple official after-sales support does not accept the phone repaired by third-party. 6. There is a possible risk for the upgraded iPhone. If this upgrade iphone storage technology was widely applied, Apple official may take some measures to stop this. 7. This iphone 6s memory upgrade process involves an easy-to-use but powerful tool PCIE NAND Flash Memory Chip Programmer for Apple Devices that will enable you to write previous data into the brand new flash drive. The operation generally follows these main steps: 1. Connect the PCIE NAND Flash Chip Programmer with computer through 2 USB-to-Lightening data cable , then press the on/off button. 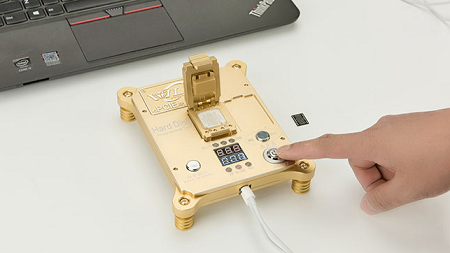 2. Sign in the "WL Software", select the specific disk type "PCIE Disk". 3. Click "Refresh Port", then “Open Port” to be prepared for data writing. 4. Install the old Nand flash chip and press the reset button 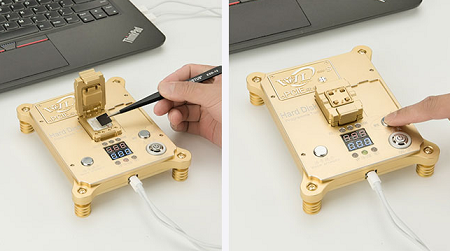 5. Click "All Data Query" to read and check whether the information queried is correct. 6. Then “back the original data” by software at a regular path. 7. Take out the old flash chip, install the brand new one instead. 8. Press the "Reset" button, then select the specific model iPhone 6s, click "write bottom". 9. Click "Write all disk data" to write iPhone 6s data to a brand new 128G flash drive with the PCIE NAND Flash Chip Programmer. 10. "All data query" to check if the data writing operation successful. 11. Bonding the new flash drive onto the motherboard. 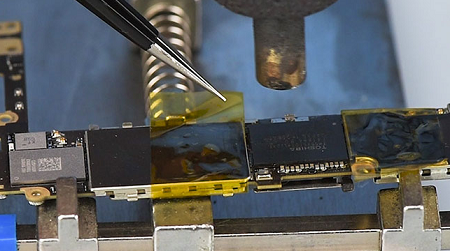 12. Install motherboard to the phone body, and then install LCD screen. 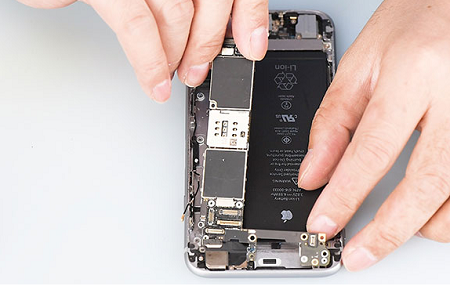 13. Restore iPhone via iTunes then activate it.  14. Test and verify the upgraded storage.  3 major practical applications of this tool: Upgrade iPhone Storage, Unlock iPad and WiFi Module Repair. The above-mentioned is only one of them.
By the way, welcome to shop the upgrade iphone storage tools on vipfixphone.com. Last week, a friend asked me about how do I reset my iPod device! I’m not sure why so many people have been asking me that lately, now because these reason, I thought I would write up a quick post on how to go about resetting your iPod if it has frozen up! Of course, I will tell you how to reset every iPod nano model, so I’ll try to list out the instructions for as many as I can! If you need more details you can ask for Vipfixphone.  The 7th Gen. iPod nano The 7th generation iPod nano looks like a shrunken iPod touch and is the only nano that offers features like a multi-touch screen, Bluetooth support, and a Home button. The way you reset it is also unique: 1. Press and hold the Hold button (in the top right corner) and the iPod Home button (on the bottom front) at the same time. 2. When the screen goes dark, let go of both buttons. 3. In another few seconds, the Apple logo appears, which means the nano is restarting. In a few seconds, you'll be back at the main screen, ready to go. The 6th Gen. iPod nano If you need to restart your 6th gen. nano, follow these steps: 1. Hold down both the Sleep/Wake button (the one on the top right) and the Volume Down button (the one on the far left). You'll need to do this for at least 8 seconds 2. The screen will go dark as the nano restarts 3. When you see the Apple logo, you can let go, the nano is starting up again. The 1st-5th Gen. iPod nano Resetting the early iPod nano models is similar to the technique used for the 6th gen. model, though the buttons are slightly different. Before you do anything else, make sure that your iPod' s hold button isn' t on. This is the little switch at the top of the iPod nano that can "lock" the iPod' s buttons. When you lock the nano, it won' t respond to clicks, which makes it appear to be frozen. You'll know that the hold button is on if you see a little orange area near the switch and a lock icon on the screen. If you see either of these indicators, move the switch back and see if this fixes the problem.  If the nano isn' t locked:
1. Slide the hold switch to the On position (so that the orange appears) and then move it back to Off. 2. Hold down both the Menu button on the click wheel and the center button at the same time. Press them for 6-10 seconds. This should reset the iPod nano. You'll know it' s restarting when the screen darkens and then the Apple logo appears. What to do if the iPad not work after reaetting? The steps to restart a nano are simple, but what if they didn' t work? There are two things you should try at that point: Plug your iPod nano into a power source (like your computer or a wall outlet) and let it charge for an hour or so. It could be that the battery is simply run down and needs to recharge. If you've charged the nano and tried all the reset steps, and your nano still doesn' t work, you may have a bigger problem than you can solve on your own. Contact Apple to get more help. More information about phone repair guides and tools, you can try Vip Fix Shop Team. You cherish your smartphone, but you can't check and judge your smartphone' s fault. What a pity! When you judge the smartphone fault, in addition to the observation and testing methods, you can can also use the cleaning method, repair welding method, replacement method and flying line method. Now vipfix will introduce you how to judge your smartphone quickly. 1. Cleaning Method Smartphones have been in different environments for a long period of time, so sometimes the dust will inevitably get into, and it is very easy to cause smartphone malfunction. At this time, we can use the cleaning method to clean internal contact reed and SIM card connection point, which easily lead to poor contact. More information: Cleaning method is a relatively simple, effective and common method of maintenance. Cleaning equipment mainly is detergents, such as alcohol. The smart phone' s contact piece, the contact reed and circuit board component pin are easily affected by the moisture, dust and corrosive gas, so it is easily to lead solder joint is oxidized or contacted badly. 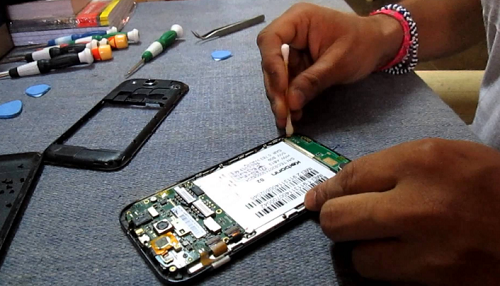 Tips: When using alcohol to clean smartphones, you should try to avoid contacting the smartphone LCD screen. If the LCD screen is dirty, you can clean it with a cleanroom wiper dipped in a little dedicated LCD screen cleaner. Alcohol is not allowed to be sprayed on the LCD screen. 2. Repair Welding Method Repair welding method is required to use the pointed anti-static soldering iron or hot air welding gun to complete welding. Smartphone has high failure rate because rosin joint. For example, smartphone can not boot or boot normal are caused due to the rosin joint. Therefore, we can perform welding repair on suspicious solder joints to eliminate faults. 3. Replacing Method The replacing method mainly uses the same type of performance component to replace the suspicion point of the smartphone. Tips: The replacing method is suitable for relatively independent plug-in components in smartphone, such as display screen, keyboard, camera, battery, etc. And it is also suitable for welding parts which are easy to disassemble and operate, such as switch button, antenna, receiver, microphone and vibrator.  4. Flying Line Method The flying line method is to use the jump wire to cross a component or a broken part of the smartphone to judge the fault or repair the fault. Hoping you can benifit from it. More information can be found at vipfixphone.com. 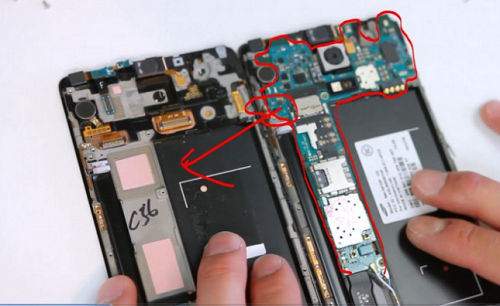 Those who have been affected with the issue say that they are presented with "Error 56" and a request to connect their device to iTunes to fix it. Of course, if connecting to iTunes and restoring did actually fix the problem then it wouldn' t be so bad but more than a few users have found their devices unusable after getting stuck in a never-ending boot loop. This isn' t the first time users have been hit with the "Error 56" problem and Apple has actually got a support page for the error, saying that users are advised to "check for hardware issues". After dropping,if the cell phone reports error 9 and 56 when flashing, this kind of symptom is basically caused by CPU to logical chip and NFC chip disconnection. Because the main CPU chip on the motherboard and PCB base get a loose connection, which results in boot failure or flashing failure so that error code appears. The customer description is shown in picture 1-1.  Flashing the device while reporting error 9, find out there is a test point with false soldering from chip to CPU, directly remove the tin above the CPU and solder at the logic chip position. As shown in picture 1-2. 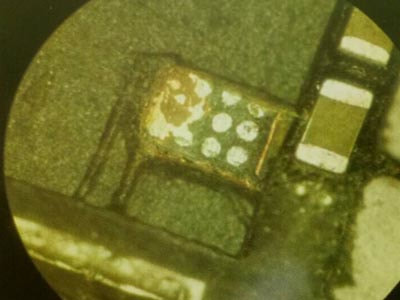 Scraping the CPU off slowly and find the signal point to solder jumper wire. As shown in picture 1-3. 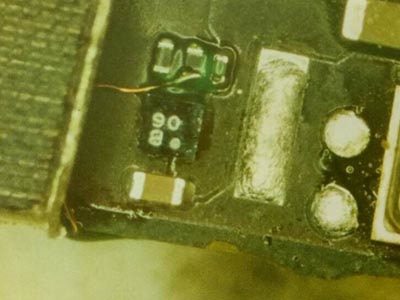 Soldering jumper on the position where the chip are connected, and the iPhone can be directly switched into the system after the connection is made up. After the customer go back for a few days, the device reported error 56 again, error 56 is caused by the broken wire from NFC to CPU or damaged NFC chip, firstly we remove the NFC chip. As shown in picture 1-4. 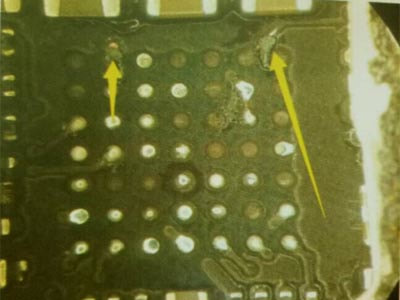 NFC chip is diconnected and most of solder points are dropped, it's all blank for the places without wire end, so soldering the useful two points with solder iron. As shown in picture 1-5. 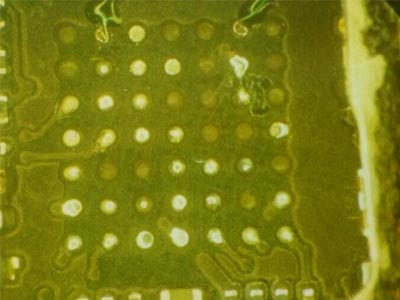 Fill in the chip, then flash the iPhone 6 device, it finally can work perfectly.
It's almost impossible to tolerate for iphone 7 to secretly upload its own phone record, but it is really existence. In fact, for this problem, a security mechanism in Russia said they had already found that, when the iPhone 7 users use the third party software (such as skype, Facetime and WhatsApp) iphone 7 will automatically collect user call records and uploaded to the apple server. If the user wants to avoid the call record being uploaded, you need to turn off the iCloud Drive. The report points out that this is actually a vulnerability in the iCloud system. So you need check your the call record on iPhone LCD screen whether right.  In response to this question, how did Apple respond?
First, apple officially acknowledged the existence of the iphone 7 automatic upload call record, the reason is mainly for those who often change iphone users. The user's call record can be synchronized, allowing users to resume calls on any of the apple products. Then, Apple also said it will pay more attention to the privacy of users, not free to steal user' s call records. And point out that the user used the password at iCloud Drive, the data on the device is encrypted. If you want to access the user's data through iCloud, or back up it, you must need the user's Apple ID and password. Finally, apple warned users to use complex passwords as much as possible, while opening a dual authentication system, in order to avoid their own information was stolen by others. Everyone has his own secrets that he doesn't want to be known to all, and even with encryption, there is a possibility of leakage. I hope Apple will improve this problem later If the problem occurs all of a sudden with your iPhone can' t turn on, but it is having enough or full battery power. Preliminary conclusion, there' s a higher chance of the display issue being inflicted by a software glitch. Software issues are easily and have the applicable workarounds to solve. However, if the hardware is at fault, it is trouble. Hardware damage to an iPhone generally requires professional repair, unless you are very tech savvy, fully equipped, and willing to take the risks of getting the iPhone bricked in the process, then you can go ahead and do the repair yourself. The iPhone 6s was damaged by dropping on the floor, which has no any response when pressing power button(VC838) to turn on. Sometimes it can be online, but sometimes cannot. The fault description is shown in picture 1-1.  Online state is not normal, drive also displays incorrectly, as shown in picture 1-2, this phenomenon is usually caused by virtual soler on CPU. This device was fell over by customer, so we can judge that the reason must be the virtual solder. After soldering CPU, the iPhone 6s can be normal online, but it displays error 4013 when flashing system.  The error 4013 is reported when the progress bar just appears on screen, as shown in picture 1-3 and 1-4 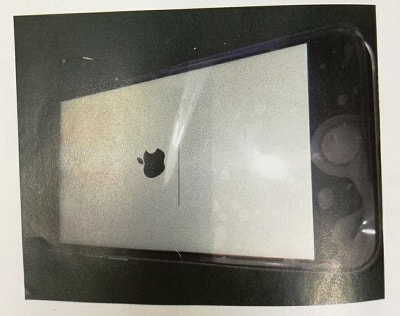 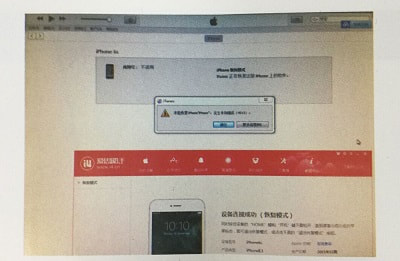 For iPhone 6S device, if this phenomenon happens, which are generally baseband problems, so we remove the baseband, indeed some tin points come off. As shown in picture 1-5 and 1-6. 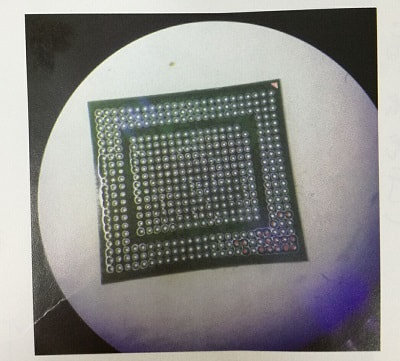 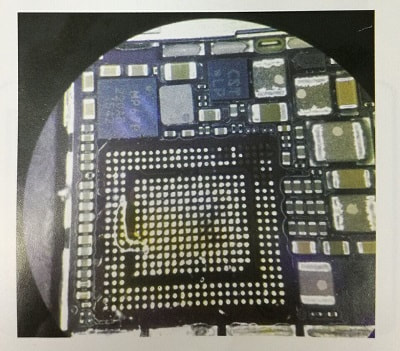 Make jumper on the disconnected but useful pin, install chip on it, but it still shows error 4013 when flashing, seems there is still a problem exist. Rooting the device repeatedly, we find when white apple appears, baseband S3, S4, S5 voltage can be instantly measured with power supply besides S2, but we still can measure the ground value on S2, is it the baseband power failure? Remove the baseband power supply chip, by the way of measuring its pin, it is found that the 91 and 97 pin of the baseband power supply chip are blocked. so we can see the problem has been found here, as shown in picture 1-7, 1-8. Remove the inductance, its pin has been damagd. The front is good while the reverse falls a pin. As shown in picture 1-9. 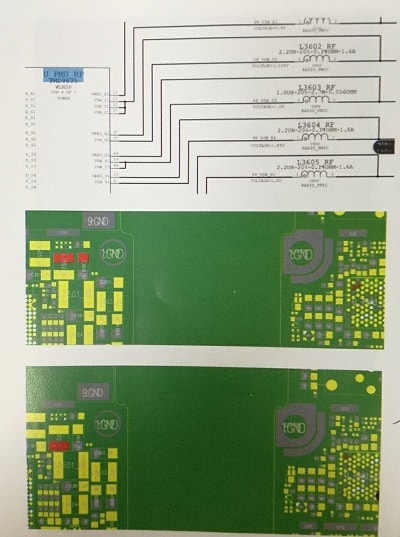 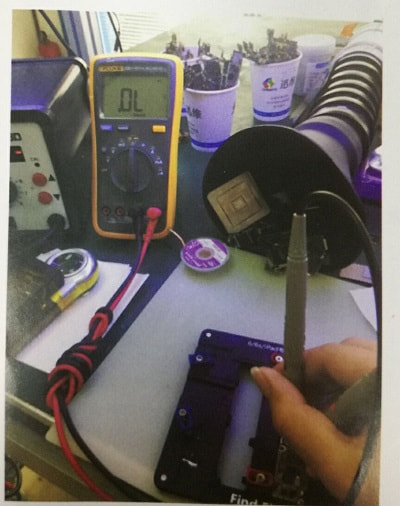 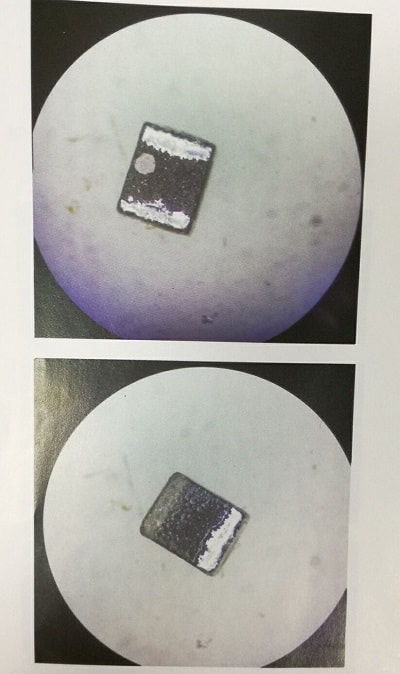 So we replace the damaged parts and install original fingerprint, the progress bar is normal when flashing now, as shown in picture 1-10 and 1-11. The repairs ended here! 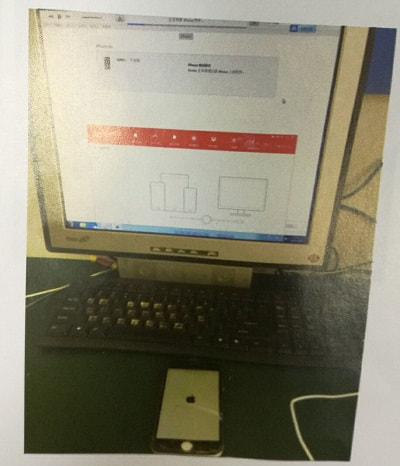 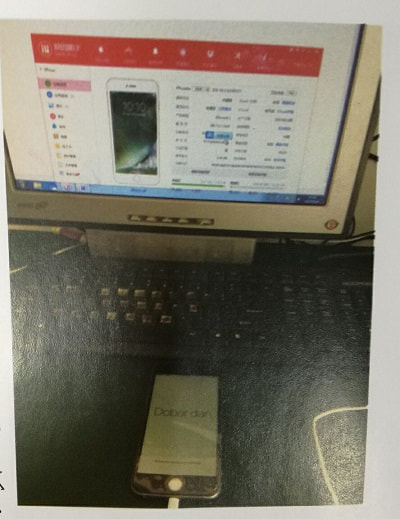 Maybe someone can face this issue that iPhone 6 Plus can' t turn on. When your iPhone gets stuck at the Apple logo or it won' t turn on completely, it triggers a mini heart-attack, because it may effect your life, work and life. A lot of people can' t leave the phone everywhere. So you must repair it by every way or buy a new one. But you not intend to buy. At this time, you had to fix it, if it is a hardware issue. Now Vip FIx Shop Team will fix the problematic iPhone 6 Plus by some repair tools. Let' s start. When we fix, we find the iPhone occasionally appear touch failure or jump randomly before dropping, it can return to normal after press switch. When repair touch IC, the iPhone 6 Plus fell to the ground, the bottom right corner of the touch screen glass is broken, and the front camera turned black, but the iPhone still can be used. A few days ago, when turn it on; the screen is blurry when the white Apple LOGO appears and it can't enter the IOS. Now, it can't boot, and the current is 150mA. GPS antenna was broken and now it shows GPS signal is weak when moving. So We remove the motherboard (picture 7-3-1) firstly, it is shocking to us. The touch IC and WiFi chip have been repaired, but it is bad. It doesn't matter, and we can fix it by replace the new chip. The most important problem is the capacitance resistor and inductor of back socket was empty solder. As shown in picture 7-3-2. 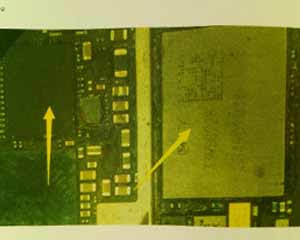 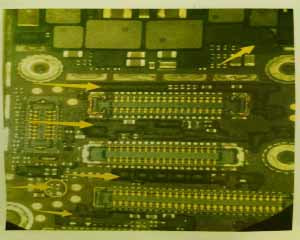 A row of resistors and capacitance, also have bad chips, it's really a headache. Connect motherboard to DC power supply, the current jumps between 70mA and 120mA. The failure is as follows: 1. The CPU was missing solder 2. Touch jump wire 3. Camera 4. Other problems caused by CP First repair CPU, omit the process, the result is shown in the picture 7-3-3.  After repair CPU, power on iPhone and test it, there still have many diode data of socket are abnormal, put it under the microscope, and we directly remove it and re-fill it, as shown in picture 7-3-4. When we remove it, we can find that the glue is gone, but the glue on normal motherboard small components won't drop. 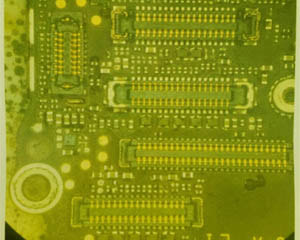 After dealing with these, test it again, still no display. Now, we can only do it step by step. Measuring display power supply, all is normal. Measure the resistance of the display socket, we found there is no 5.7V power supply, but when measuring the voltage behind it, it is present, so we suspect that it is disconnect. After measurement, it's really disconnected. Solder jump wire as show in picture 7-3-5 and 7-3-6.   After jump wire, test it, the display back to normal, but the touch function doesn't work. Solder jump wire with soldering station to fix touch MI pin, as show in picture 7-3-7. 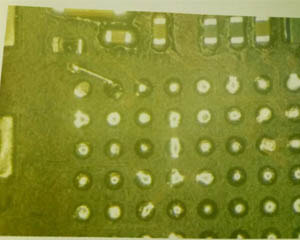 After soldering the jump wire and chip, enter the IOS and test it, there still have a problem with the front camera, and there is a vertical bar where the rear camera takes pictures. The problem of rear camera is caused by camera 2.5V power supply direct connect and PVCCMAN short connect. As shown in picture 7-3-8. 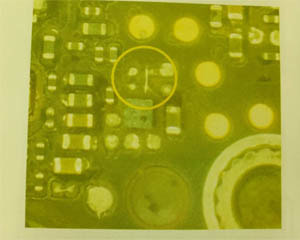 The problem with the front camera is that the inductor is connected directly to the lead, as shown in picture 7-3-9. 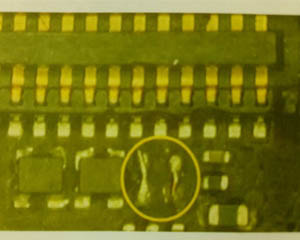 Fill the missing components and measure the resistance data, we found that the value of the front complement element has 10 Ohms difference. Power on and test it, both of the rear and front camera are normal. But the deviation of the front camera resistance may cause by CPU, now is good, maybe it will be damaged after a period of use. Picture 7-3-10.  Finally, the problem of the iPhone 6 Plus has been solved, as shown in picture 7-3-11. 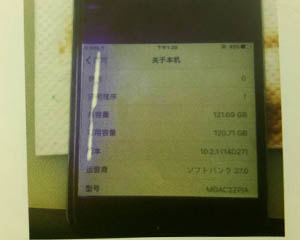 If the iPhone 6 touch screen can' t work, what can you do? iPhone 6 Plus The tech company is rolling out a repair program to fix iPhone 6 Plus devices with unresponsive touchscreen features. This situation called "Touch Disease" refers to the touchscreen issues that surface after the phone undergoes stress, like being dropped on the floor several times. In many cases, iPhone users have complained the touchscreen will entirely stop working for several months. So when you come across this situation, you can follow these steps to recover your iPhone 6 Plus. Vip Fix Shop Team can help you. Got to fix an iPhone 6 plus device, the customer' s decription is touch failure. It was repaired in the local cell phone maintenance service, but after using for a few days, the iPhone 6 plus "touch failure" phenomenon appeared again, he returned to repair several times, the failure is still existing. The fault description is shown in picture 1-1. 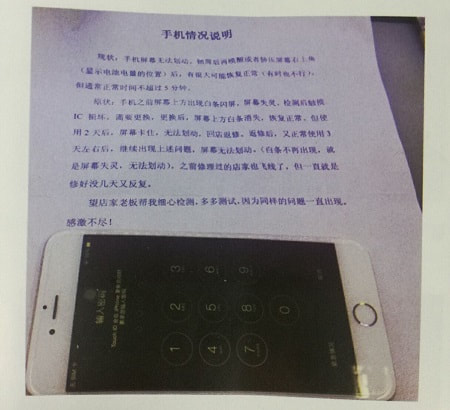 The device was dropped on ground accidentally by customer, the touch failure fault is definitely caused by U2402 black touch M1 pin sync signal disconnection. It has been repaired, but there will still be the same phenomenon for touch failure, as if the fault was expanded after the last repairs. Remove the U2402, and reinstall the jumper, the iPhone 6 plus device can be used for a while, but there will be no touch function phenomenon, it seems that the problem is not from here. After careful observation under microscope, it shows that the inductance and capacitance of J2019 diplay pin get tin explosure. As shown in figure 1-2. 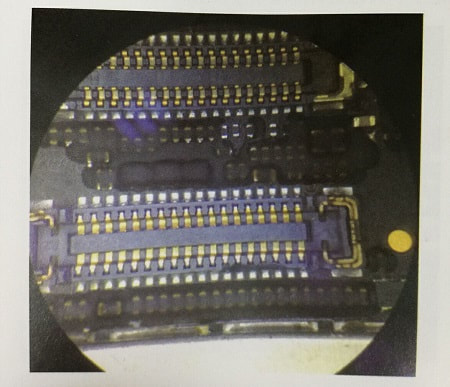 Measure the ground resistance, as shown in picture 1-3 and 1-4, the inductance of signal synchronous is virtual soldered. 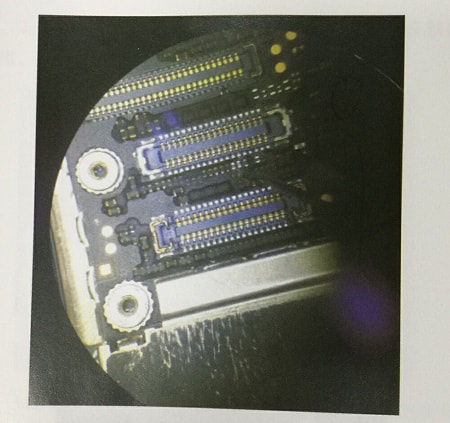  So we solder it back with a soldering iron, resistance shows normal now. As shown in picture 1-5. 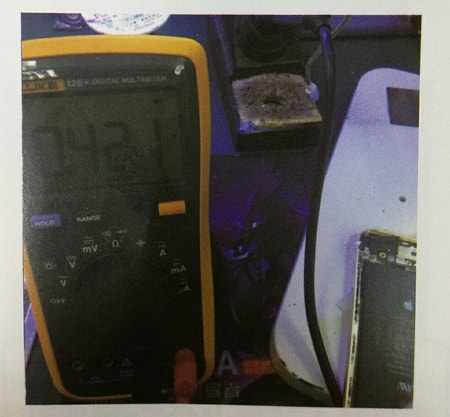 Install the iPhone 6 plus and test again, a day later appeared the display fault again. Measure the resistance of display pin, we find there are no resistance in many parts, gently touch inductor and capacitor with tweezers under the microscope, all of them can be moved, it looks like a large scale is virtual soldered. So we decisively disassemble the whole parts and re welding them again. As shown in picture 1-6 and 1-7. 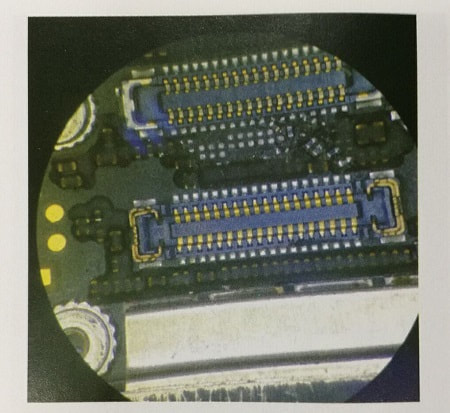 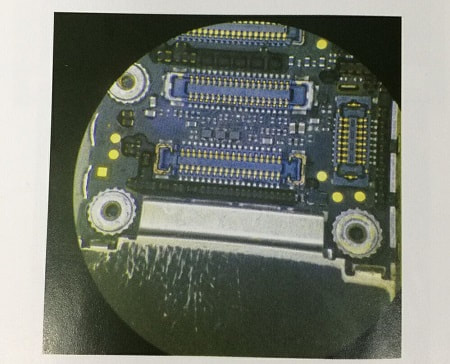 Intall the device and test, everything is normal now,the backside seal inductor and capacitor is virtual soldered, which may be caused by long-time air gun blowing operation. The whole maintenance process is finally successful!
|
vipfixphone
|


 RSS Feed
